Madrix Recording Tutorial
Step-by-step guide on how to record a new cue from Madrix.
Initial Setup
- Connect the Recorder and PC to Internet switch (Madrix should not be started yet)
- Set PC to
2.0.0.99static IP - Type
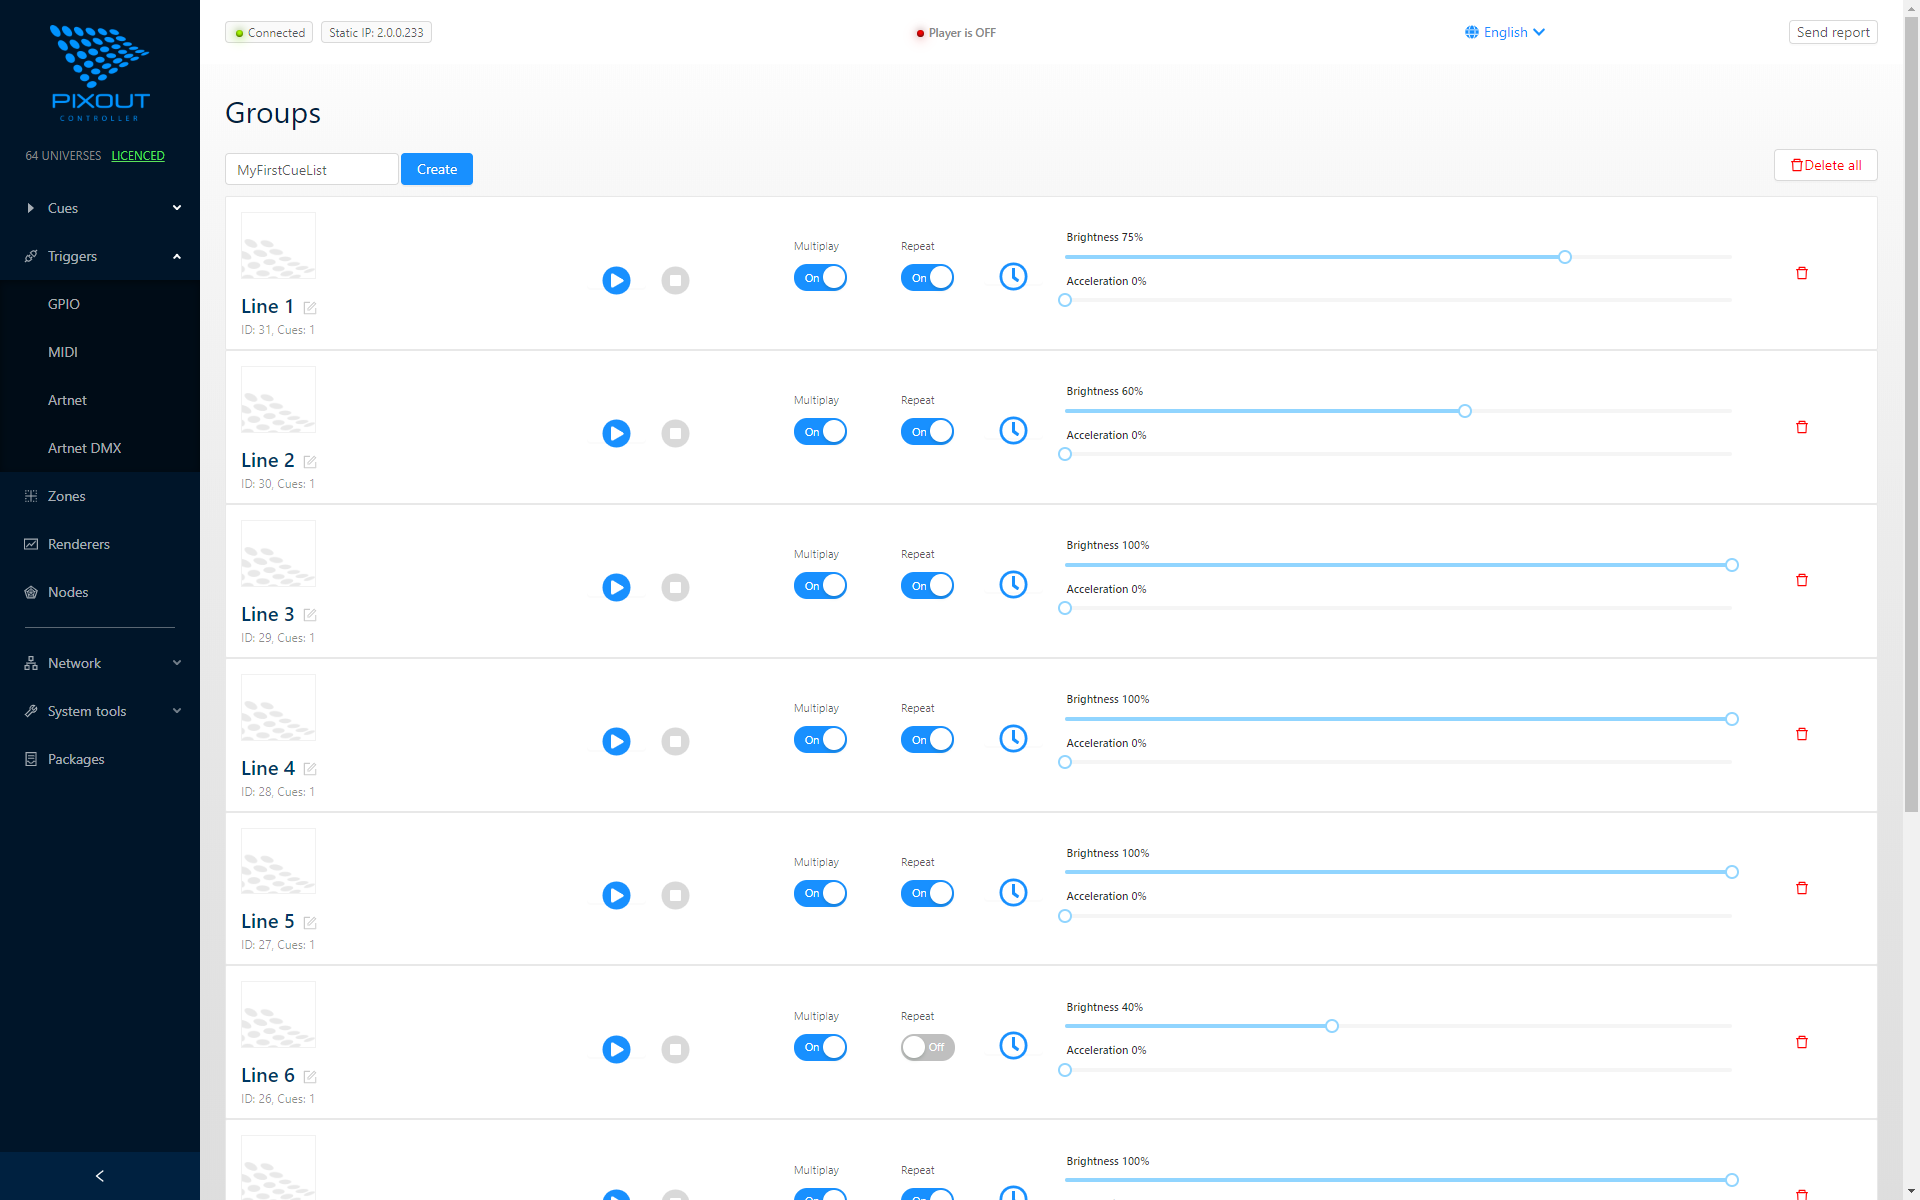
2.0.0.230/px-adminaddress in your Internet browser - Navigate to Cues > Groups page
If done correctly, you would see the screen as below:
Create and Populate Cuelist
- Specify a cue list name and click the Create button. You successfully created empty cue list, it's time to populate it
- Click on the cuelist name. New dialogue should pop up, where you can record ArtNet sequences by clicking the Grab button. You need to specify cue name and press Grab and Stop buttons accordingly
Configure Madrix
- Start Madrix and select latest project file
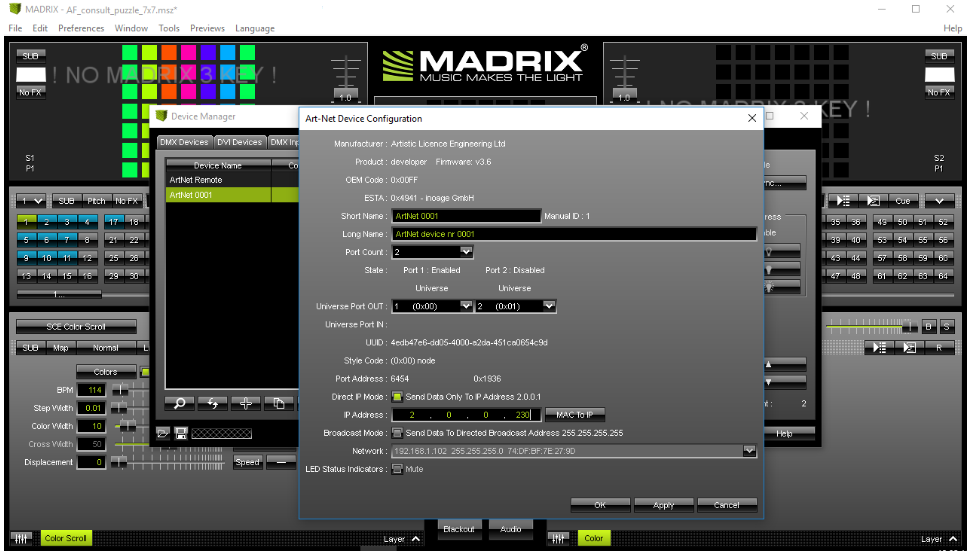
- Go to Preferences > Device Manager > ArtNet and double click on ArtNet device, now you are in ArtNet device configuration
- Tick on Direct IP mode and set
2.0.0.230address or use Search button to retrieve Pixout IP automatically - Click Apply button and go back to the Madrix home screen
Recording
- Now you are ready to record!
tip
Without the dongle Madrix is working for around 40 sec and goes blackout for around 20 sec. You need to be ready with recording during 40 sec. You can save the project under different names (for example: setup_for_recording).
- If ArtNet sequences reach the Recorder, you will see message "Recording in progress", otherwise you will see "Waiting" message
- Click the Stop button to stop ArtNet sequences recording. New recorded cue will be approved automatically

After you are done with recording, stop Madrix and go back to 2.0.0.230/px-admin in the Internet browser. Now you can select the cue to play.